Tuesday, December 31, 2013

Ice Shaver


Did some spring cleaning today and found a lot of treasures in my kitchen! one of which is an ice-shaver.. super cute and i had to test it out.. well, guess what? it works! :D

Sunday, December 29, 2013

Chicken Sandwich with Banana-flavored Scrambled Eggs


this dish was inspired by the roasted chicken sandwich i had at The Missing Pan... 

i made it for breakfast this morning and added scrambled eggs to the sandwich.. i always add milk to my scrambled eggs and since i only had the meiji banana-flavoured milk in my fridge so there go.. banana-flavoured scrambled eggs!

chicken was marinated overnight with ginger, garlic, sesame oil, oyster sauce, sugar and dried italian herb mix! i know the last ingredient sounds a bit out of place but well, that's the best part about home cooking.. add whatever you have/like but well.. just don't overdo it.. :)

Saturday, December 28, 2013

Pop-out Heart Agar Agar


super happy to find the heart shaped moulds in Daiso the other day! only 4 left and i grabbed all of them! :P

A little something for the ladies.. a pity Serene can't make it!

Saturday, December 21, 2013

Mua Chee


A really simple and easy to make recipe. Credits go to my colleague, Monica :)

Ingredients for dough
1 cup glutinous rice flour
3/4 cup water
1 tsp sugar

Method
1. Mix ingredients until the glutinous rice flour dissolves in water.
2. Lightly coat a non-stick frying pan with oil.
3. Pour in the glutinous rice flour mixture and fry till it becomes doughy.
4. Serve with sugar, sesame seeds and peanut powder.

Sunday, December 1, 2013

Banana Cake


One of the first few cakes I ever made and probably the cake that got me started on baking..

Sunday, November 24, 2013

Mandarin Orange Agar Agar Cheesecake


First time using canned mandarin oranges for this recipe. The oranges added a tinge of sourness to the otherwise sweet cake. Worth doing it again. Moreover, the cake looks pretty with the mandarin oranges laid out on top..


Saturday, November 9, 2013

Steamed Cupcakes


Clockwise from top left: Minno no Tabo, random smiley face, pacman, cheers

after steaming, the cupcakes pooFed and can't really see the outline of pacman.. hehe..

this time round, i used flavoured yoghurt instead of plain yoghurt.. also added a little bit of mango essence.. and the final product had a very slight tinge of fruity taste to it..


Tuesday, November 5, 2013

Yam Cake


made 2 lots of yam cake over the weekend cos bought too much yam... (-_-)"

Sunday, November 3, 2013

Pop-up Star Agar Agar


Chocolate Cake


when i shared my red velvet cupcakes with my colleagues the other day, everyone was in awe of how pretty the cupcakes were.. they accepted it with open palms.. but when i brought this chocolate cake to office the other day.. it was a different feel altogether.. and well, i rarely get comments on the stuff i bring to office to share.. but for this chocolate cake.. my colleagues came up to me and said it tasted really nice.. it's a sad reality that looks count.. this applies to cakes and (most) humans.. :(

let me speak for the cake: i'm ugly but i'm yummy ;)

original recipe from here.

Ingredients:
120 gm unsweetened chocolate chips
1/3 cup cocoa powder
1 cup boiling water
2 1/4 cup plain flour
2 tsp baking powder
1 tsp baking soda
1/4 tsp salt
226 gm unsalted butter
2 cups/400 gm sugar
3 eggs
2 tsp vanilla extract
1 cup/240 ml milk

Method:
1) Combine the chocolate chips and cocoa powder in a bowl.
2) Pour in the boiling water and stir well till the chips and powder have melted. Set aside to cool.
3) In a separate bowl, whisk to combine, the flour, baking powder, baking soda, and salt.
4) In the bowl of your electric mixer, or with a hand mixer, beat the butter until smooth and creamy. Gradually add the sugar and continue beating until the mixture is fluffy.
5) Add the eggs, one at a time, mixing well after each addition. Scrape down the sides of the bowl as needed.
6) Add the vanilla extract and melted chocolate mixture and beat to combine.
7) Add the milk and flour mixtures in three additions, beginning and ending with the flour mixture. Beat only until the ingredients are incorporated.
8) Pour the batter into a large mould. I usually use a 9" x 9" square mould.
9) Bake for at least 1 hour or until a toothpick inserted in the center comes out clean.
10) Remove from oven and place on a wire rack to cool.

The baking time I've stated differs from the original recipe as I baked the batter in one large mould.. when i use 5 rectangular corrugated paper moulds measuring 3.5" x 7" each, the baking time reduces to less than an hour.

I like to serve this cake chilled.. either that or you can serve it warm with a scoop of ice-cream.

p/s: i have not tried the frosting recipe.

Monday, October 28, 2013

Steamed Cupcakes

I got the recipe from here.

Ingredients:
100g White Wings pancake mix (original)
1 medium size egg
30g Castor sugar
30g plain yoghurt (or flavoured yoghurt like mango yoghurt)
30ml  fresh milk
15g unsalted/salted butter (melted)

1 teaspoon plain flour
edible red food colouring

Method:
1) Put sugar and egg in a mixing bowl, mix well with egg whisk.
2) Add in yoghurt and milk, mix well after each addition.
3) Pour pancake mix, mix and blend well, then add in melted butter, mix until mixture is well combined.
4) Take 2 teaspoon mixture from (3) into a small bowl, add in 1 teaspoon of  plain flour, a drop of red colouring, and mix well. Pour the batter into a small piping bag.
5) Pour the plain cupcake batter into muffin cups with cupcake liner until 70% full. Tap the bottom of the muffin cup 3 to 4 times to expel the air. Pipe the desired pattern you like on top of each cupcakes.
6) Steam over medium low heat for 12- 15 minutes or until cooked.


First batch before steaming:
First batch after steaming:
As you can see, a couple "burst".. I'm guessing it was because the temperature was too high.. so for the second batch, I adjusted the heat..

Second batch before steaming:
Second batch after steaming:
and altogether now...


Close up:
I'm quite pleased with how they turned out.. the texture of the cupcakes were better than i expected them to be.. it was a little springy and sponge-like.. taste-wise.. it was bland.. probably add some flavoured essence the next time.. 

Tuesday, October 22, 2013

White Wings' Devilish Red Velvet Cupcakes with Cream Cheese Frosting

got this from Melbourne earlier this year.. they have a HUGE range of White Wings cake mixes in the supermarket.. had a hard time deciding which to get.. in the end, i bought a lemon cheesecake one (which i failed in doing.. threw like 95% of the cake away..) and this! Devilish Red Velvet Cupcakes..

Front:

Back:

Super easy to follow instructions and ingredients to add on - milk, eggs, oil and butter.. 

what i liked about this is that they stated it will make 12 cupcakes and it really did! no more no less.. and best part, they even provided the bright red cupcake cases! fits perfectly well in my muffin tray..

so here's how the cupcakes look like after they are out of the oven:

i used a round tip and disposable piping bag to pipe the cream cheese frosting onto each cupcake.. to be honest, the frosting tasted milky rather than cheesy.. it was also not as firm as i thought it would be but it was firm enough to rest nicely on the top of each cupcake..

added some chocolate sprinkles (not included in the box) on top just to make it look nicer :)

the cake texture was alright.. but if i really had to be picky about it, it was slightly on the dry side.. having said that, some of my colleagues who ate it told me it's quite moist.. so i guess it really depends on individual.. it wasn't too sweet too which is a good thing.. but i guess many people were attracted to the appearance of the cupcake more than anything..

i shall try to make it myself from scratch some day! already got the recipe.. just need to find time to do it..

Tuesday, October 15, 2013

m.i.c.k.e.y. m.o.u.s.e.~~


experimenting agar2 within agar2.. i did one using my hello kitty mould but didn't turn out as nice as this one.. 

Sunday, September 15, 2013

Sunday, September 8, 2013

Dinner on a Sunday evening...


top: stir-fry pork liver with onion, garlic, ginger and spring onions
bottom: chicken cooked in a slow cooker with mushrooms, celery and carrots

Stir-fry Lala


lunch for dad..

Sunday, September 1, 2013

Chocolate Chip Cookies

fri - walnut cake
sat - agar agar cheesecake + starry agar agar
today - chocolate chip cookies

WOW! i haven't bake THAT much in a while! phew..

Agar Agar Cheesecake

Recipe can be found at the side menu :)

i was at Sun Lik the other day.. just walking through.. with no intention to buy anything and i found this!!!!!! Oreo crushed cookie bits! As you can see from the price tag, it costs $4.50 for a 454g pkt and so i decided to make (yet another) agar agar cheesecake...

so based on the recipe, we need a block of philly cream cheese...

half tsp of vanilla essence, ~2 tsp gelatine powder.. to my knowledge, there are 2 types of gelatine powder.. one made with beef extract and another is from fish.. you can use either one, up to your preference..

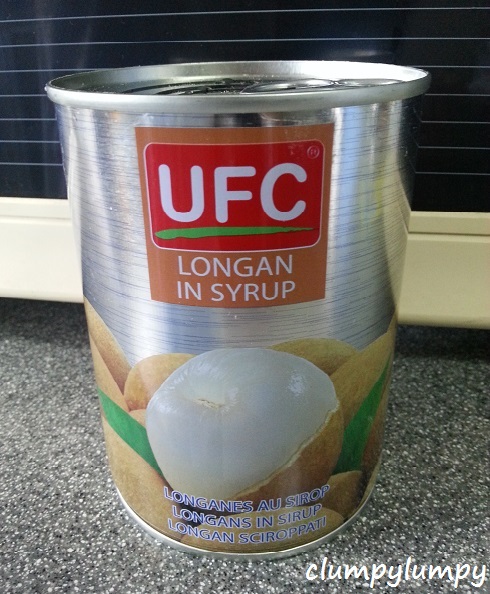
I found this in my cabinet so i used this... you can use any type of fresh fruits that doesn't oxidize easily or other canned fruits..

this is the brand of agar agar i use.. you can use a jelly mix or konnyaku i guess.. i like the crunch of agar agar so opted for this..

This is how the crushed Oreo cookie bits look like.. it's not very fine so perhaps you may wish to pound it further..

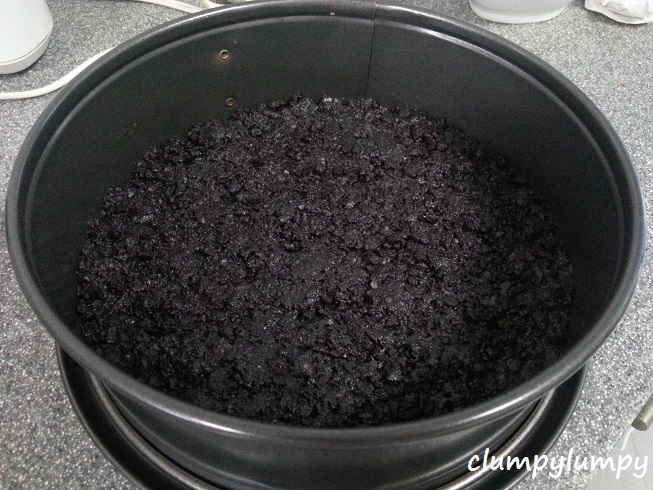
combine the melted butter and oreo bits in a bowl.. mix well

Pour the mixture into a pan, press it out evenly on the pan and freeze it.. i used a 8" round springform pan..

 Put the cream cheese and sugar into the mixing bowl..

 Cream it till well-combined..

Add the vanilla essence..

Cream it again..

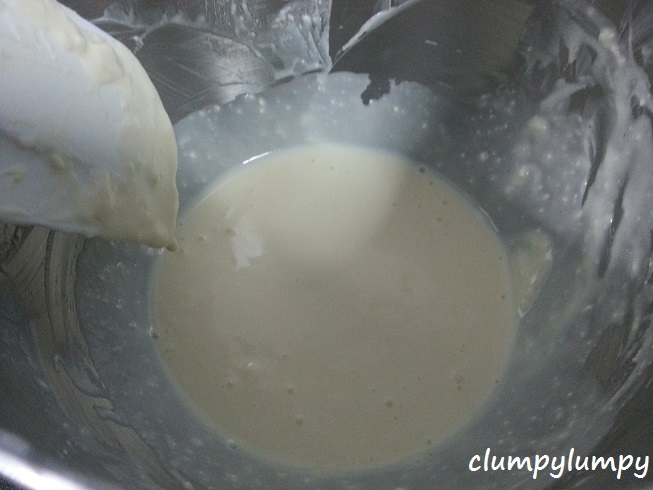
Add the gelatine mixture into the mixing bowl..

Cream it.. remember to scrap the sides of the bowl..

When the mixture becomes a liquid, it's done!

Take out the pan from the freezer and pour the cream cheese mixture into it..

shake the pan a little so the mixture is smoothed out.. chill in the fridge to let it harden..

once the cream cheese mixture sets, take it out from the fridge and layer the fruits over it..

try to cover the entire surface if possible.. and put the pan back into the fridge.. in the meanwhile, prepare the agar agar according to the instructions on the packet..

 take the pan out from the fridge and slowly pour the agar agar mixture into the pan..

it's up to you how much agar agar to pour.. i like it to cover the entire layer of fruits and a little more over the top.. let it set in the fridge..

and there you have it! as you can tell from the picture, the base isn't very even.. that's because i didn't pound the cookie bits finer.. i used the bits as they were.. so if you would like a more even base, pound it till it's like powdery..

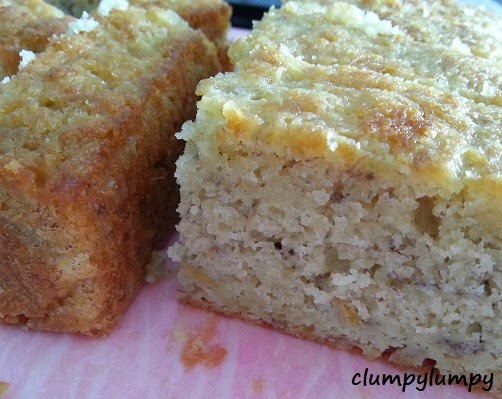
dessert is served :)